在我们开发项目的时候需要实时查看代码的效果,但是我们不能一直编译打包发布代码,如此之多的重复性工作会是很没有必要的,影响开发效率和工作心态。
通过在Myeclispe上安装JRebel插件和在marven项目中配置tomcat插件和jrebel插进即可实现代码的即时发布和项目的热部署,下面我们来看看具体怎么操作。
myeclispe安装破解JRebel插件
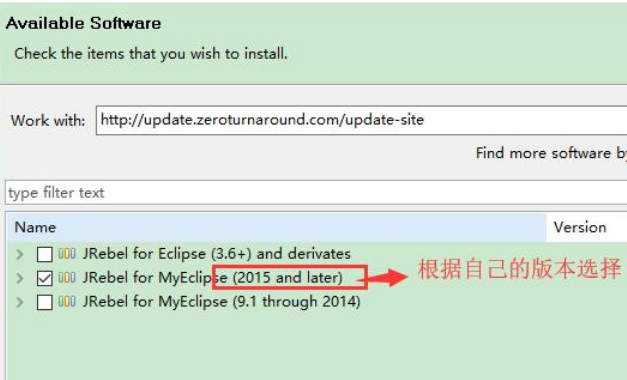
1.JRebel 插件安装
点击 Help -> Instal from site ,输入地址 http://update.zeroturnaround.com/update-site ,选择相应的版本点击下一步即可安装。

2.激活 JRebel
下载反向代理工具 https://pan.baidu.com/s/1UvDf8YrC2enbAsbPh0zdEA 密码 qao3
打开工具,并保持窗口,不要关闭。(该工具会拦截 JRebel 的官方激活地址,并替换成另一个地址,从而实现激活)
安装完成后MyEclipse会重启,重启完成后点击 Help -> JRebel -> Activition 即可进入激活页面
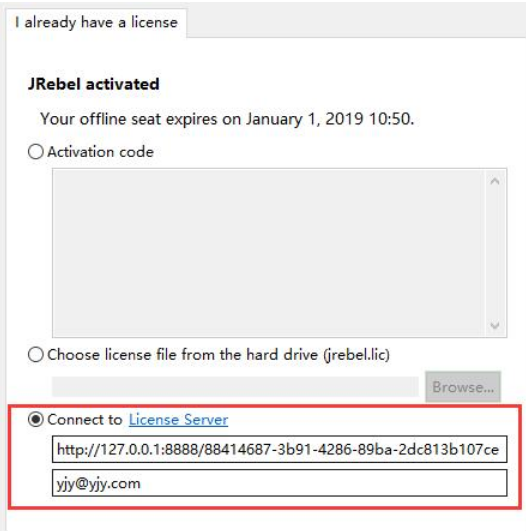
上面地址填写 http://127.0.0.1:8888/88414687-3b91-4286-89ba-2dc813b107ce ,下面邮箱随便填一个,就可以完成激活。
激活完成后,点击 Help -> JRebel -> Configuration 进入设置页面,开启离线模式,完成后关闭反向代理工具。(激活时间大概为半年,失效后需要重新激活。还有一种激活方式,是上JRebel的官网,上面提供个人非商业用途的开发者免费激活,注册完成并分享到Twitter或者Facebook上就可以用了。)
enter image description here

此时可以关闭反向代理工具ReverseProxy_windows_amd64.exe
tomcat热部署实现
pom.xml中配置
<plugin>
                <groupId>org.apache.tomcat.maven</groupId>
                <artifactId>tomcat7-maven-plugin</artifactId>
                <version>2.2</version>
                <configuration>
                    <!--配置tomcat的路径 -->
                    <url>http://localhost:8080/manager/text</url>
                    <server>tomcat7</server> <!-- 与settings.xml文件中server的id相同 -->
                    <!--tomcat的url编码,达到和修改server.xml文件一样的功能 -->
                    <uriEncoding>UTF-8</uriEncoding>
                    <update>true</update>
                    <!--打包和部署的文件夹名字,默认为项目名 <path>/webapp</path> -->
                </configuration>
            </plugin>
tomcat7的conf目录下的tomcat-users.xml中配置用户权限
<role rolename="admin-gui"/>

<role rolename="admin-script"/>

<role rolename="manager-gui"/>

<role rolename="manager-script"/>

<role rolename="manager-jmx"/>

<role rolename="manager-status"/>

<user username="admin" password="1234" roles="manager-gui,manager-script,manager-jmx,manager-status,admin-script,admin-gui"/>
我的是本地连接可能远程tomcat服务器的发布需要权限设置,设置即可
tomcat的conf目录下server.xml文件配置如下
  <Host name="localhost"  appBase="webapps"
            unpackWARs="true" autoDeploy="true">

        <!-- SingleSignOn valve, share authentication between web applications
             Documentation at: /docs/config/valve.html -->
        <!--
        <Valve className="org.apache.catalina.authenticator.SingleSignOn" />
        -->

        <!-- Access log processes all example.
             Documentation at: /docs/config/valve.html
             Note: The pattern used is equivalent to using pattern="common" -->
        <Valve className="org.apache.catalina.valves.AccessLogValve" directory="logs"
               prefix="localhost_access_log." suffix=".txt"
               pattern="%h %l %u %t "%r" %s %b" />

      </Host>
marven的setting文件配置,镜像的使用的是自己的nexus服务器,你们可以用阿里的
<server>

       <id>tomcat7</id>

       <username>tomcat</username>

       <password>1234</password>

    </server>
<mirror>
    <id>nexus-aliyun</id>
    <mirrorOf>*</mirrorOf>
    <name>Nexus aliyun</name>
    <url>http://maven.aliyun.com/nexus/content/groups/public</url>
</mirror>
JRebel配置marven
1、pom.xml中配置
    <plugin>
                <groupId>org.zeroturnaround</groupId>
                <artifactId>jrebel-maven-plugin</artifactId>
                <version>1.1.5</version>

                <executions>
                    <execution>
                        <id>generate-rebel-xml</id>
                        <phase>process-resources</phase>
                        <goals>
                            <goal>generate</goal>
                        </goals>
                    </execution>
                </executions>
            </plugin>
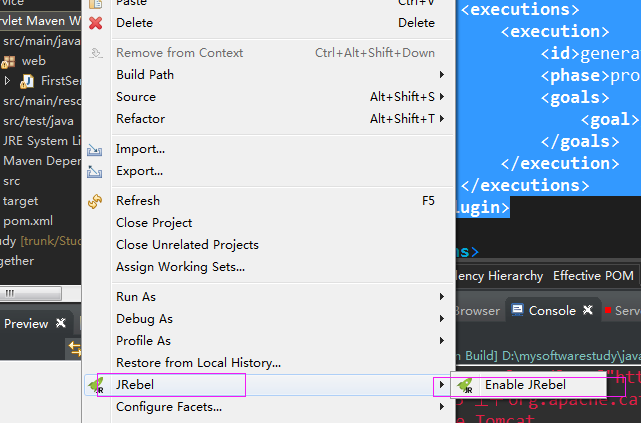
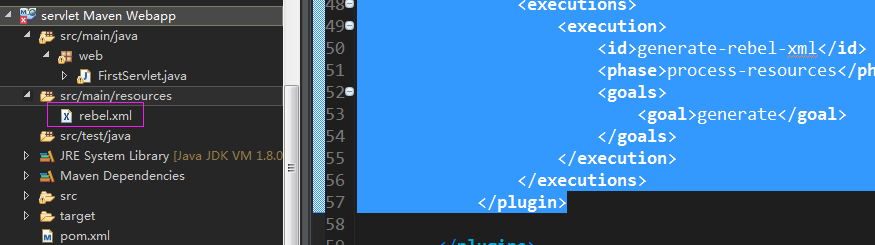
2、项目右键,使用JRebel会在项目的src/main/resources目录下自动生成rebel.xml配置文件:
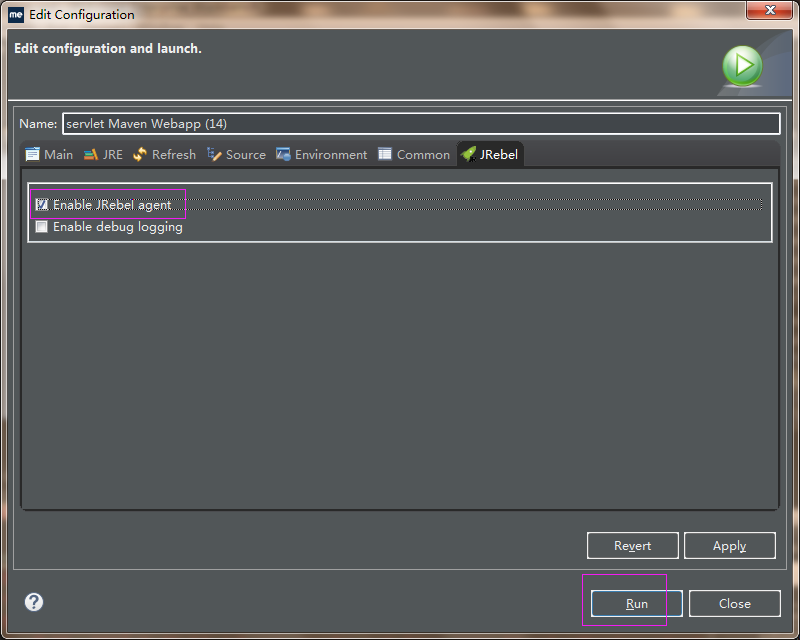
3、选中项目点击右键–>Run As–>Maven build…:
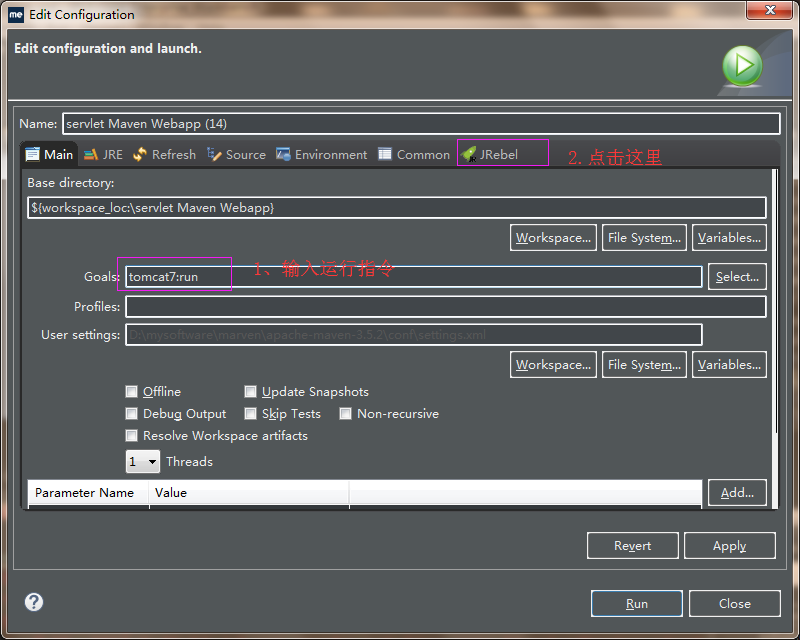
运行测试
若是项目不需要运行tomcat7:deploy,运行反而出错,这是marven插件的tomcat,而不是本地或者远程服务器
直接访问即可,访问servle
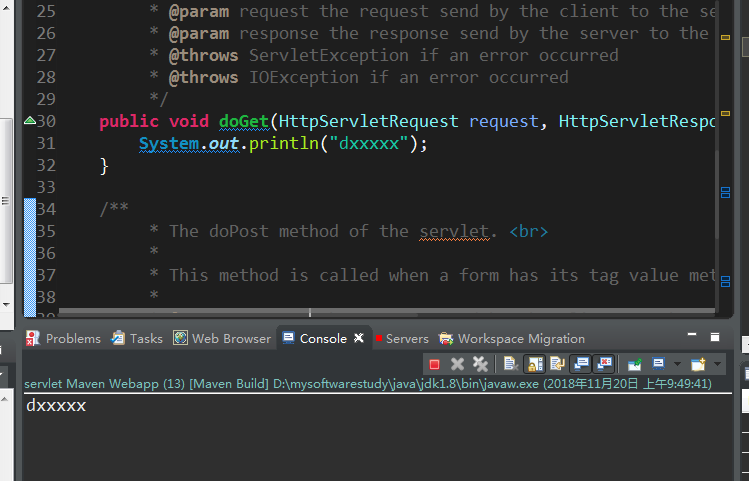
修改代码后不重新编译和部署代码到服务器,自动编译发布,访问结果如下
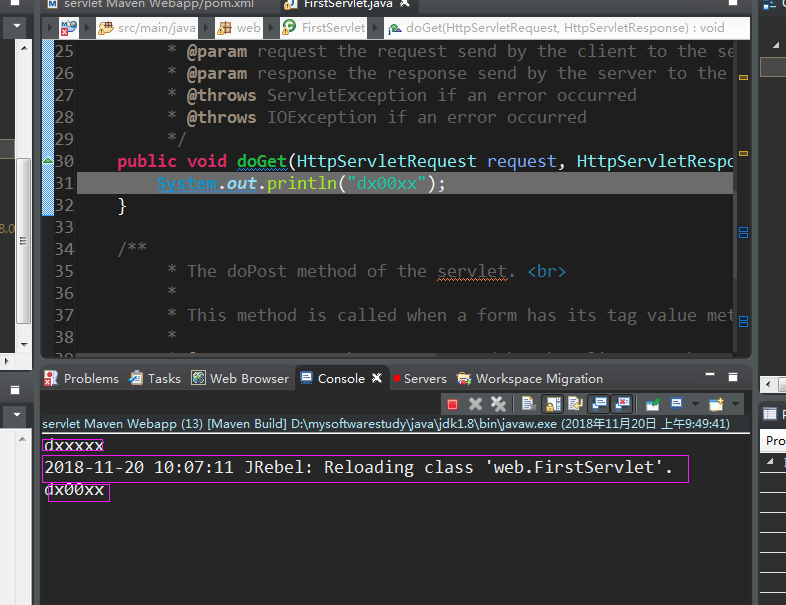
此时的tomcat运行的是marven版的,不是服务器端的,且web.xml配置文件修改必须重新发布项目
直接远程提示以下错误:
[2018-11-20 10:40:41] [Project servlet Maven Webapp, server local] Synchronization failed! JRebel remote server did not respond. The remote server has to be started with the JVM argument: -Drebel.remoting_plugin=true.
[2018-11-20 10:40:41] Synchronization took 7110 ms in total.
远程的先不考虑了,浪费很长时间了,本地测试好了远程发布上去即可
参考
—JRebel与Windows服务的Tomcat集成
tomcat与eclipse独立运行的远程开发配置(远程dubug和jrebel热部署)
Eclipse中使用JRebel实现项目热部署(Maven插件版)
MyEclipse热部署—-使用工具 JRebel