下载
官网下载地址 https://www.sourcetreeapp.com/
安装环境
安装 .NET Framework 4.7.2 https://dotnet.microsoft.com/download/thank-you/net472
安装破解
1、登陆bucket注册一个用户
2、下载版本控制系统
3、安装完成
跳过注册的方法如下
- 找到目录:C:\Users\用户\AppData\Local\Atlassian\SourceTree
-
新建accounts.json文件里面输入
    [
      {
        "$id": "1",
        "$type": "SourceTree.Api.Host.Identity.Model.IdentityAccount, SourceTree.Api.Host.Identity",
        "Authenticate": true,
        "HostInstance": {
          "$id": "2",
          "$type": "SourceTree.Host.Atlassianaccount.AtlassianAccountInstance, SourceTree.Host.AtlassianAccount",
          "Host": {
            "$id": "3",
            "$type": "SourceTree.Host.Atlassianaccount.AtlassianAccountHost, SourceTree.Host.AtlassianAccount",
            "Id": "atlassian account"
          },
          "BaseUrl": "https://id.atlassian.com/"
        },
        "Credentials": {
          "$id": "4",
          "$type": "SourceTree.Model.BasicAuthCredentials, SourceTree.Api.Account",
          "Username": "",
          "Email": null
        },
        "IsDefault": false
      }
    ]
环境
宝塔面板安装GitLab
apache+PHP+mysql
设置代理和其他
第一次登陆时设置密码,默认的用户名为root,在个人资料设置-》账户-》修改用户名

新用户默认只能创建10个项目,点击管理区域,找到用户,修改即可设置可以创建的项目个数
设置gitlab登陆地址的反向代理
http://47.98.41.101:8099/users/sign_in
在/www/server/panel/vhost/apache/中添加gitlab.conf文件,内容如下xxx.com是你的域名
将域名解析至改服务器
<VirtualHost *:80>
    ServerName xxx.com
    ServerAlias xxx.com
    RewriteEngine On
    SetEnvIf Authorization "(.*)" HTTP_AUTHORIZATION=$1
    ProxyPass / http://127.0.0.1:8099/
    ProxyPassReverse / http://127.0.0.1:8099/
</VirtualHost>
SSH密匙生成方法
github的用户添加简单,用户名密码天机即可完成,gitlab暂时没找到添加方法
由于无法添加gitlab账户,只能添加SSH密匙
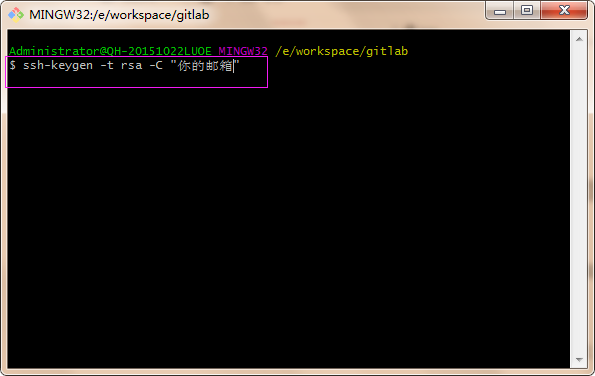
两次回车过后即可生成ssh,文件位置
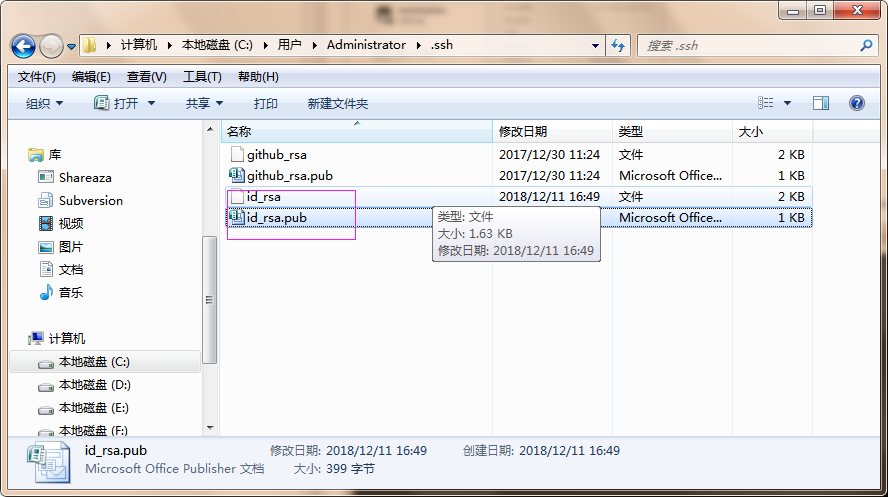
在GitLab的用户ssh添加

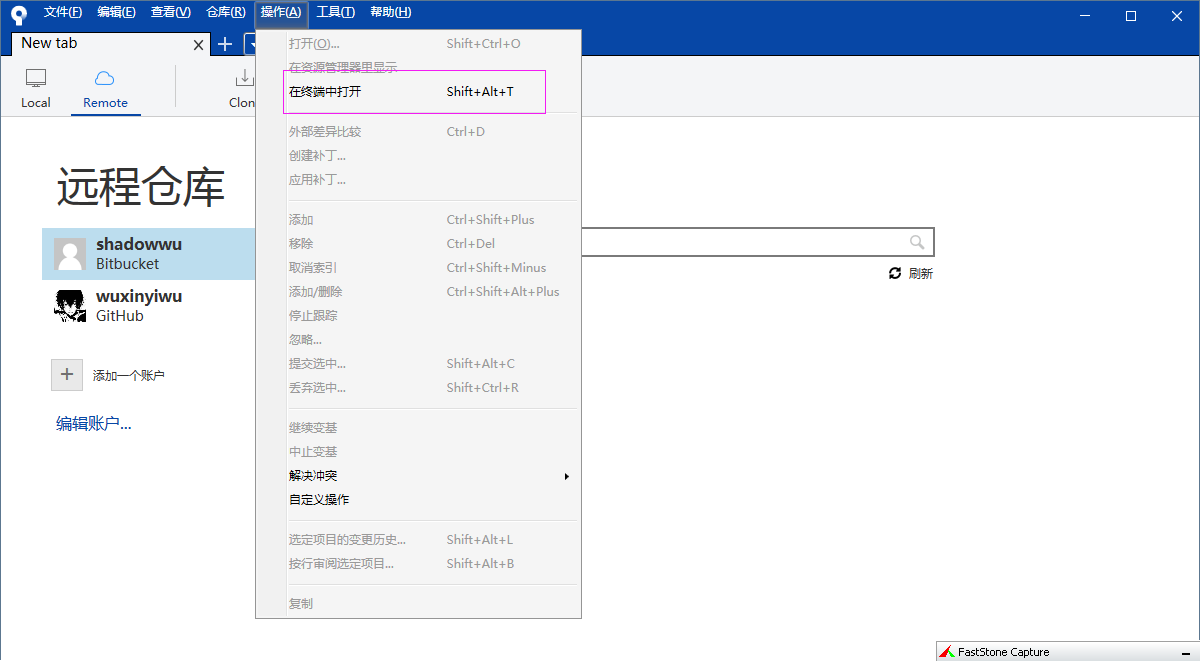
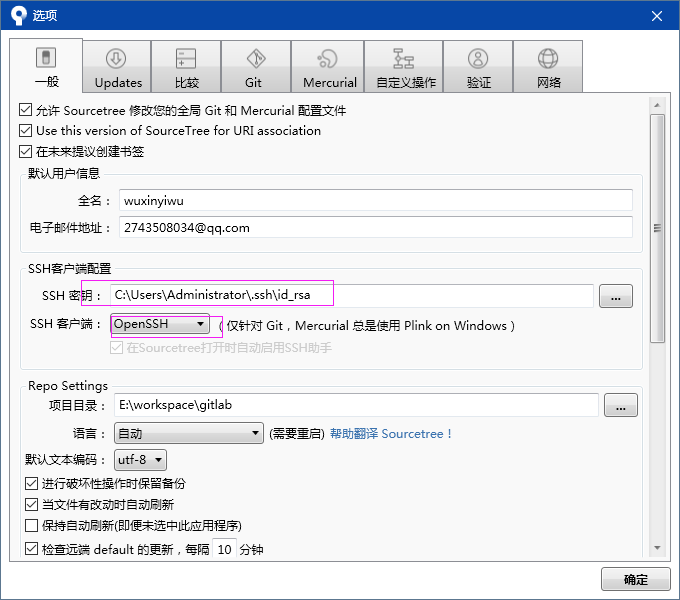
在sourcetree的工具-》选项 添加密匙
配置忽略文件
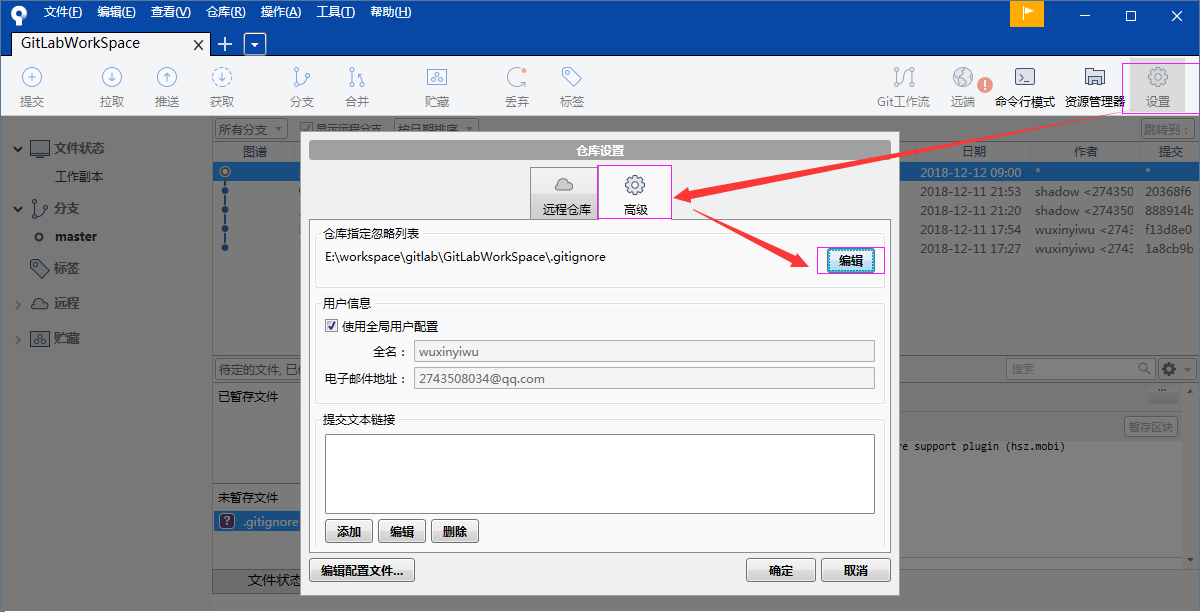
配置示例:
##ignore this file##
/target/
.classpath
.project

.settings
 ##filter databfile、sln file##
*.mdb
配置解释:
##注释
/target/ :过滤文件设置,表示过滤这个文件夹

*.jar  ,*.tar  ,*.class 表示过滤某种类型的文件

/mtk/do.c ,/mtk/if.h  表示指定过滤某个文件下具体文件

 !*.c , !/dir/subdir/     !开头表示不过滤
 *.[oa]    支持通配符:过滤repo中所有以.o或者.a为扩展名的文件