建立Hello项目
1、添加依赖
<!--添加依赖的jar包-->
     <dependencies>
         <!--项目要使用到junit的jar包,所以在这里添加junit的jar包的依赖-->
         <dependency>
             <groupId>junit</groupId>
             <artifactId>junit</artifactId>
             <version>4.9</version>
             <scope>test</scope>
         </dependency>
     </dependencies>
2、在src/main/java/first下新建文件Hello.java
package first;

public class Hello {
    public String sayHello(String name){
                return "Hello "+name+"!";
         }

}
3、
package first;
//导入junit的包
import org.junit.Test;
import static junit.framework.Assert.*;
public class HelloTest {
        @Test
          public void testHello(){
             Hello hello = new Hello();
             String results = hello.sayHello("gacl");
             assertEquals("Hello gacl!",results);
         }
}
对项目进行编译并解决错误
对marven项目编译有两种方法
1、一种是通过cmd到项目pom.xml路径下运行mvn compile
2、myeclipse中右键run as-》Marven build-》输入compile 运行即可
错误
maven 程序包org.junit不存在
将
<dependency>
  <groupId>junit</groupId>
  <artifactId>junit</artifactId>
  <version>4.10</version>
  <scope>test</scope>
</dependency>
改成
<dependency>
  <groupId>junit</groupId>
  <artifactId>junit</artifactId>
  <version>4.10</version>
</dependency>
错误
[WARNING] File encoding has not been set, using platform encoding UTF-8, i.e. build is platform dependent!

[WARNING] /E:/workspace/myeclipse/first/src/main/java/first/HelloTest.java:[2,3]
 编码UTF-8的不可映射字符
[WARNING] /E:/workspace/myeclipse/first/src/main/java/first/HelloTest.java:[2,4]
 编码UTF-8的不可映射字符
[WARNING] /E:/workspace/myeclipse/first/src/main/java/first/HelloTest.java:[2,5]
 编码UTF-8的不可映射字符
[WARNING] /E:/workspace/myeclipse/first/src/main/java/first/HelloTest.java:[2,6]
 编码UTF-8的不可映射字符
在pom.xml中添加
 <properties>
         <project.build.sourceEncoding> UTF-8</project.build.sourceEncoding>
</properties>
解决第一个警告
并且在myeclipse中将环境的编码改为utf-8解决不可映射字符警告
编译成功的项目结构
编译成功后会在target目录下生成2个文件夹,实际上target目录下有4个文件夹,不过myeclipse只显示其中两个
classes和test-classes文件夹没有显示
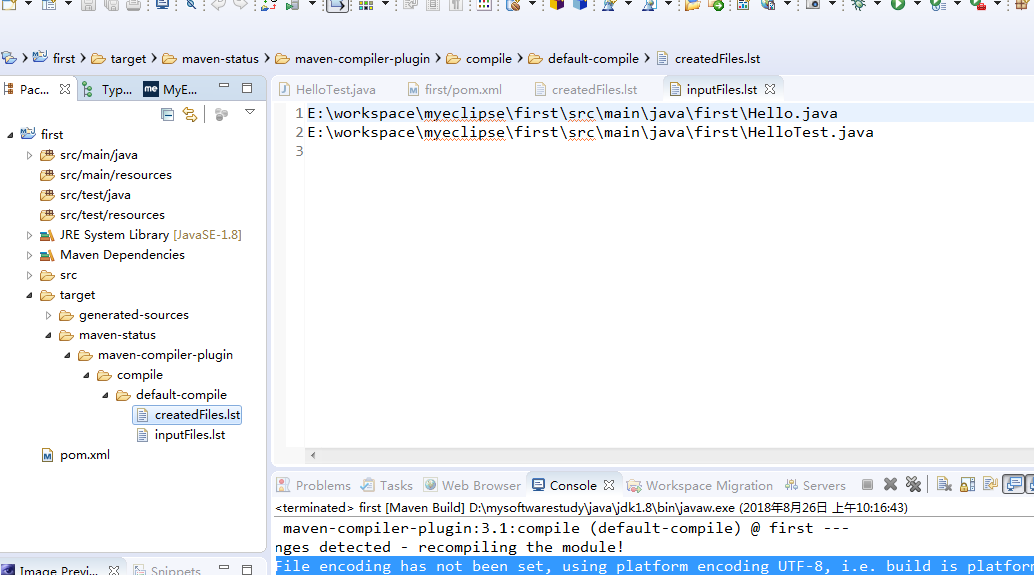
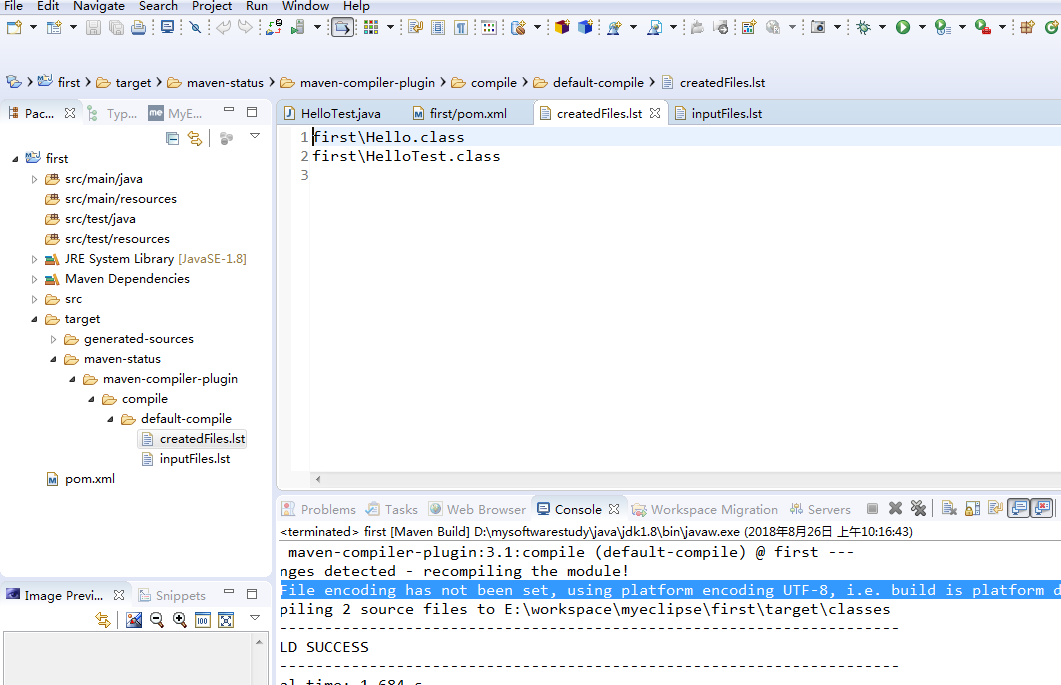
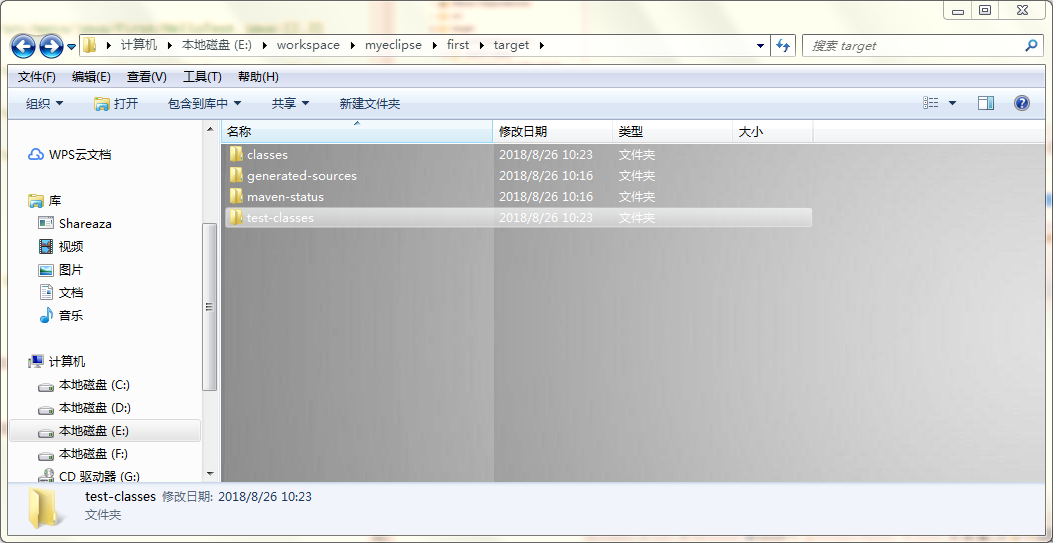
classes文件夹中存放的就是Maven我们编译好的java类,存在两个文件
Hello.class
HelloTest.class
清理marven项目
1、cmd在项目pom.xml路径下使用mvn clean清理项目
2、myeclipse右键run as-》marven clean即可
清理项目的过程就是把执行”mvn compile”命令编译项目时生成的target文件夹下的所有文件删掉
测试marven项目
1、cmd在项目pom.xml路径下使用mvn test测试项目
2、myeclipse右键run as-》marven test即可
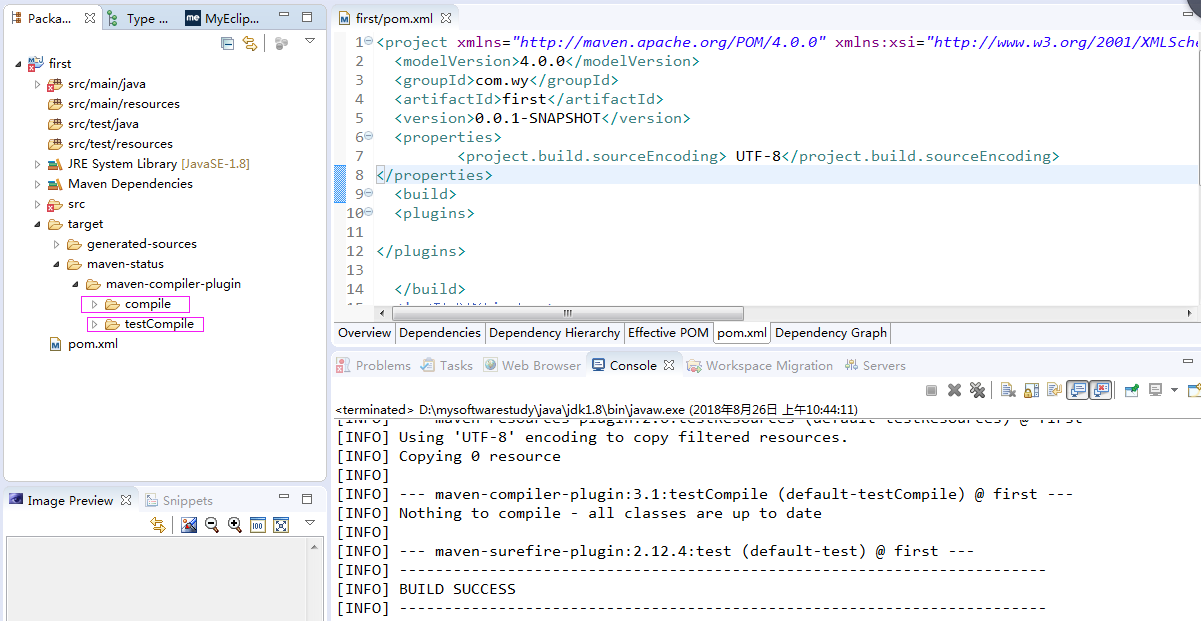
自动在target目录下新建2个目录,可以看出,比编译,测试会在maven-compile-plugin下多一个testCompile文件夹,进行测试之前会先对项目进行编译
打包marven项目
1、通过cmd到项目pom.xml路径下运行mvn package
2、myeclipse中右键run as-》Marven build-》输入package 运行即可
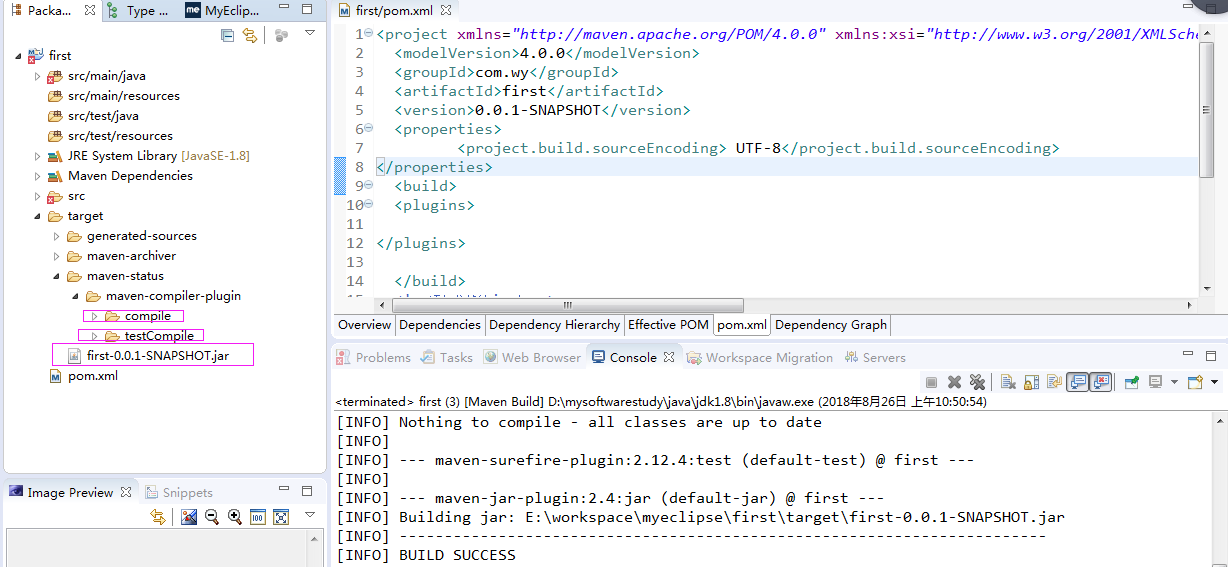
会将打包的项目文件放在target目录下
在打包之前会编译测试项目
Maven部署项目
1、cmd在项目pom.xml路径下使用mvn install部署项目
2、myeclipse右键run as-》marven install即可
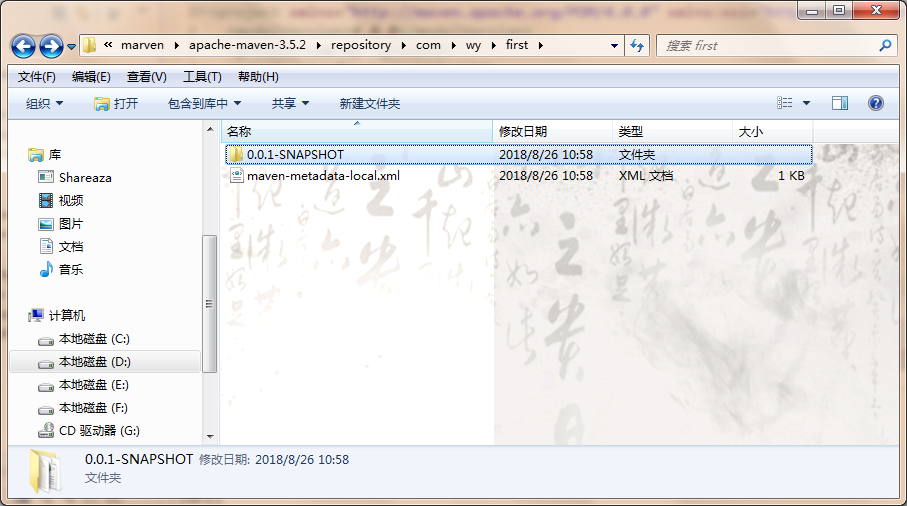
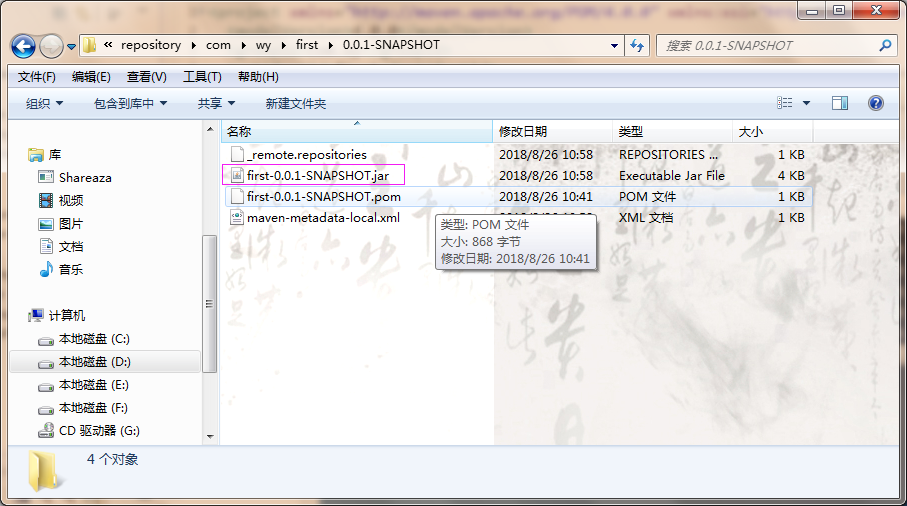
mvn install会将项目编译-》测试-》打包,然后将项目存放到我们的仓库中,此命令做的事情比较多
组合使用marven命令
1、通过cmd到项目pom.xml路径下运行mvn clean package
2、myeclipse中右键run as-》Marven build-》输入clean package 运行即可
除了mvn clean package ,还有mvn clean install, mvn clean test比较常用
在别的项目中使用通过Maven安装生成的项目的jar包
引用在仓库中的jar包,只需在配置文件中添加依赖即可
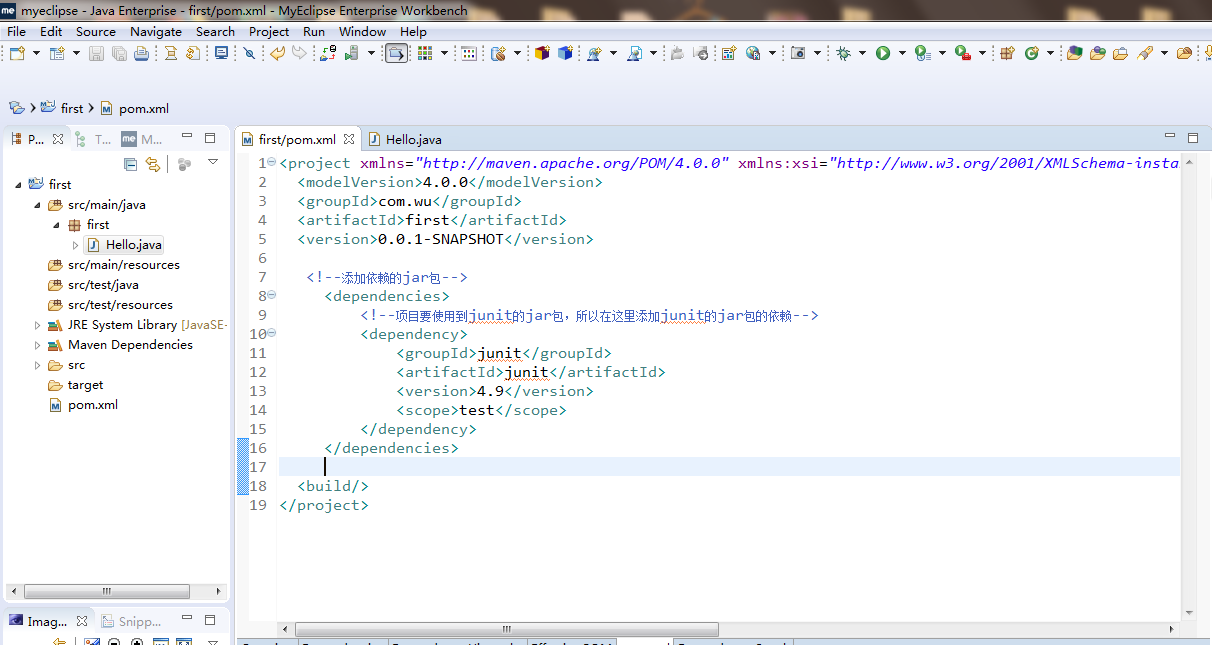
新建HelloFriend项目
配置文件添加
<project xmlns="http://maven.apache.org/POM/4.0.0" xmlns:xsi="http://www.w3.org/2001/XMLSchema-instance" xsi:schemaLocation="http://maven.apache.org/POM/4.0.0 http://maven.apache.org/xsd/maven-4.0.0.xsd">
  <modelVersion>4.0.0</modelVersion>
  <groupId>com.wy</groupId>
  <artifactId>firstfriend</artifactId>
  <version>0.0.1-SNAPSHOT</version>
  <build/>
    <properties>
         <project.build.sourceEncoding> UTF-8</project.build.sourceEncoding>
</properties>
  <!--添加依赖的jar包-->
     <dependencies>
         <!--项目要使用到junit的jar包,所以在这里添加junit的jar包的依赖-->
         <dependency>
             <groupId>junit</groupId>
             <artifactId>junit</artifactId>
             <version>4.9</version>
         </dependency>
          <!--项目要使用到Hello的jar包,所以在这里添加Hello的jar包的依赖-->
         <dependency>
            <groupId>com.wy</groupId>
             <artifactId>first</artifactId>
             <version>0.0.1-SNAPSHOT</version>
         </dependency>
     </dependencies>
</project>
其中
  <!--项目要使用到Hello的jar包,所以在这里添加Hello的jar包的依赖-->
         <dependency>
            <groupId>com.wy</groupId>
             <artifactId>first</artifactId>
             <version>0.0.1-SNAPSHOT</version>
         </dependency>
是引入之前所建项目的依赖。根据groupId,groupId和version即可定位
测试:
在src-》main-》java-》firstfriend下新建文件HelloFriend.java
package firstfriend;

import first.Hello;

public class HelloFriend {
    public String sayHelloToFriend(String name){

                  Hello hello = new Hello();
                 String str = hello.sayHello(name)+" I am "+this.getMyName();
                 System.out.println(str);
                 return str;
             }

             public String getMyName(){
                 return "John";
             }
}
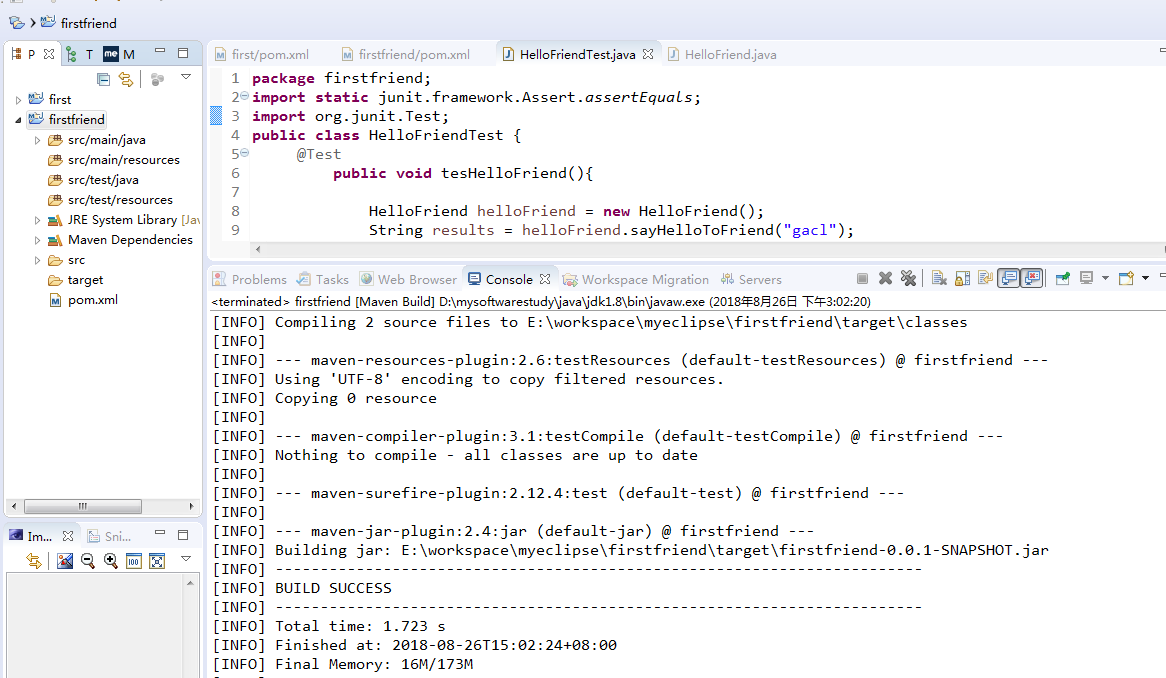
同理新建HelloFriendTest.java
package firstfriend;
import static junit.framework.Assert.assertEquals;
import org.junit.Test;
public class HelloFriendTest {
     @Test
         public void tesHelloFriend(){

             HelloFriend helloFriend = new HelloFriend();
             String results = helloFriend.sayHelloToFriend("gacl");
             assertEquals("Hello gacl! I am John",results);
         }
}
1、cmd在HelloFriend目录下执行命令”mvn package”测试first-0.0.1-SNAPSHOT.jar里面的类是否引用成功
2、myeclipse-》run as-》marven build-》package 运行